

How To Create Cpp File In Code Blocks
This page is a guide to many of the beginning (and some intermediate) features of the creation and modification of a Code::Blocks project. If this is your first experience with Code::Blocks, here is a good starting point.
The project wizard
Launch the Project Wizard through File->New->Project... to start a new project. Here there are many pre-configured templates for various types of projects, including the option to create custom templates. Select Console application, as this is the most common for general purposes, an click Go.
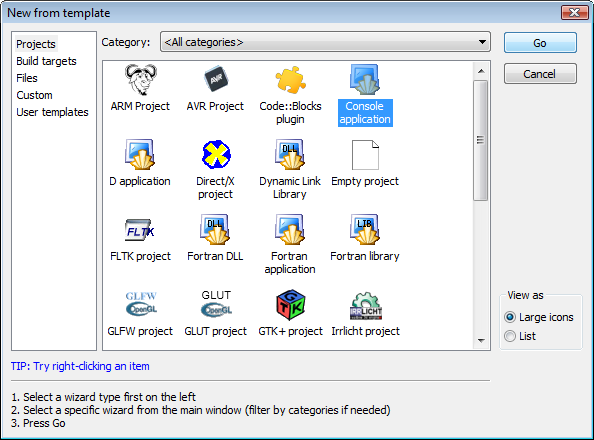
Note: red text instead of black text below any of the icons signifies it is using a customized wizard script.
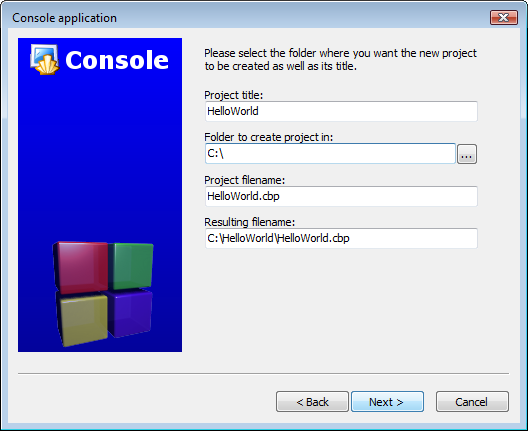
The console application wizard will appear next. Continue through the menus, selecting C++ when prompted for a language. In the next screen, give the project a name and type or select a destination folder. As seen below, Code::Blocks will generate the remaining entries from these two.
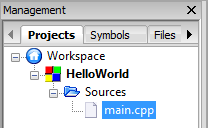
Finally, the wizard will ask if this project should use the default compiler (normally GCC) and the two default builds: Debug and Release. All of these settings are fine. Press finish and the project will be generated. The main window will turn gray, but that is not a problem, the source file needs only to be opened. In the Projects tab of the Management pane on the left expand the folders and double click on the source file main.cpp to open it in the editor.
This file contains the following standard code.
main.cpp
#include <iostream> using namespace std; int main() { cout << "Hello world!" << endl; return 0; } Changing file composition
A single source file is of little uses in programs of any useful complexity. In order to handle this, Code::Blocks has several very simple methods of adding additional files to the project.
Adding a blank file
In this example, we will be splitting the function
main.cpp
cout << "Hello world!" << endl;
into a separate file.
Note: it is generally improper programming style to create a function this small; it is done here to give a simple example.
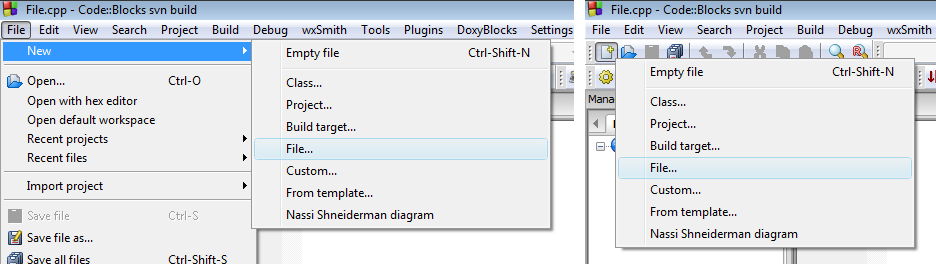
To add the new file to the project, bring up the file template wizard through either File->New->File... or Main Toolbar->New file (button)->File...
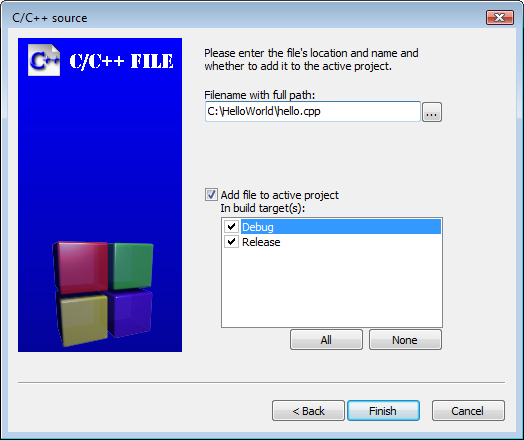
Select C/C++ source and click Go. Continue through the following dialogs very much like the original project creation, selecting C++ when prompted for a language. On the final page, you will be presented with several options. The first box will determine the new filename and location (as noted, the full path is required). You may optionally use the ... button to bring up a file browser window to save the file's location. Checking Add file to active project will store the filename in the Sources folder of the Projects tab of the Management panel. Checking any of the build targets will alert Code::Blocks that the file should be compiled and linked into the selected target(s). This can be useful if, for example, the file contains debug specific code, as it will allow the inclusion to (or exclusion from) the appropriate build target(s). In this example, however, the hello function is of key importance, and is required in each target, so select all the boxes and click Finish to generate the file.
The newly created file should open automatically; if it does not, open it by double clicking on its file in the Projects tab of the Management panel. Now add in code for the function main.cpp will call.
hello.cpp
#include <iostream> using namespace std; void hello() { cout << "Hello world!" << endl; } Adding a pre-existing file
Now that the hello() function is in a separate file, the function must be declared for main.cpp to use it. Launch a plain text editor (for example Notepad or Gedit), and add the following code.
hello.h
#ifndef HELLO_H_INCLUDED #define HELLO_H_INCLUDED void hello();
0 Response to "How To Create Cpp File In Code Blocks"
Post a Comment